S7venGen Studio Help Center
Help & User Guide
Current instructions for organizing footage, preparing edits, creating and revising promos, and publishing content from your workspace.
Workflow at a glance
Use the same five-part path for a quick automatic promo or a detailed hands-on edit.
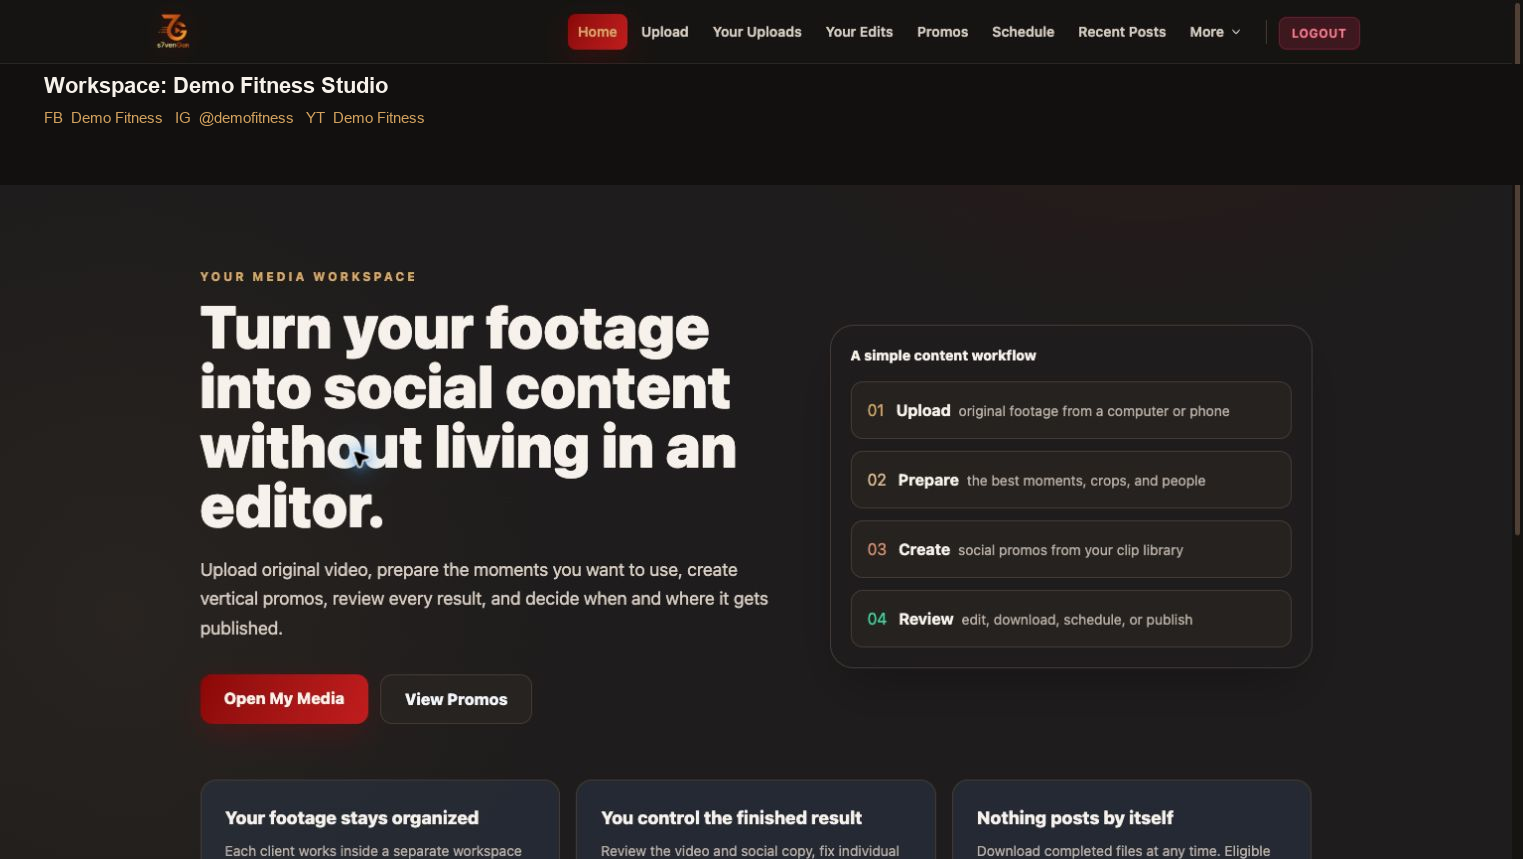
Upload
Add original photos, Live Photos, or video.
Prepare
Prepare useful photo and video moments as ready 9:16 edits.
Create
Choose footage and create a promo.
Review
Play the full video and revise it.
Deliver
Download, publish now, or schedule.
Important: wait for processing to finish before judging whether an upload or edit is missing. The processing drawer on Edit Uploads shows work that is still queued, running, completed, or needs attention.
Quick and Advanced modes
Choose a simpler guided interface or show every editing and publishing control.
- Automatic uses Quick mode on phones and Advanced mode on larger screens.
- Quick keeps the main upload, create, review, and publish path visible while hiding optional controls.
- Advanced shows framing, soundtrack, scheduling, folder, and detailed editing controls.
On a phone, open Menu and use the Interface buttons. To make the choice permanent, open More → Profile, select Automatic, Quick, or Advanced, and save Workspace Settings.
Upload media and organize footage
Upload photos, Live Photos, and horizontal or vertical video. Footage folders keep separate events, shoots, and projects from mixing together.
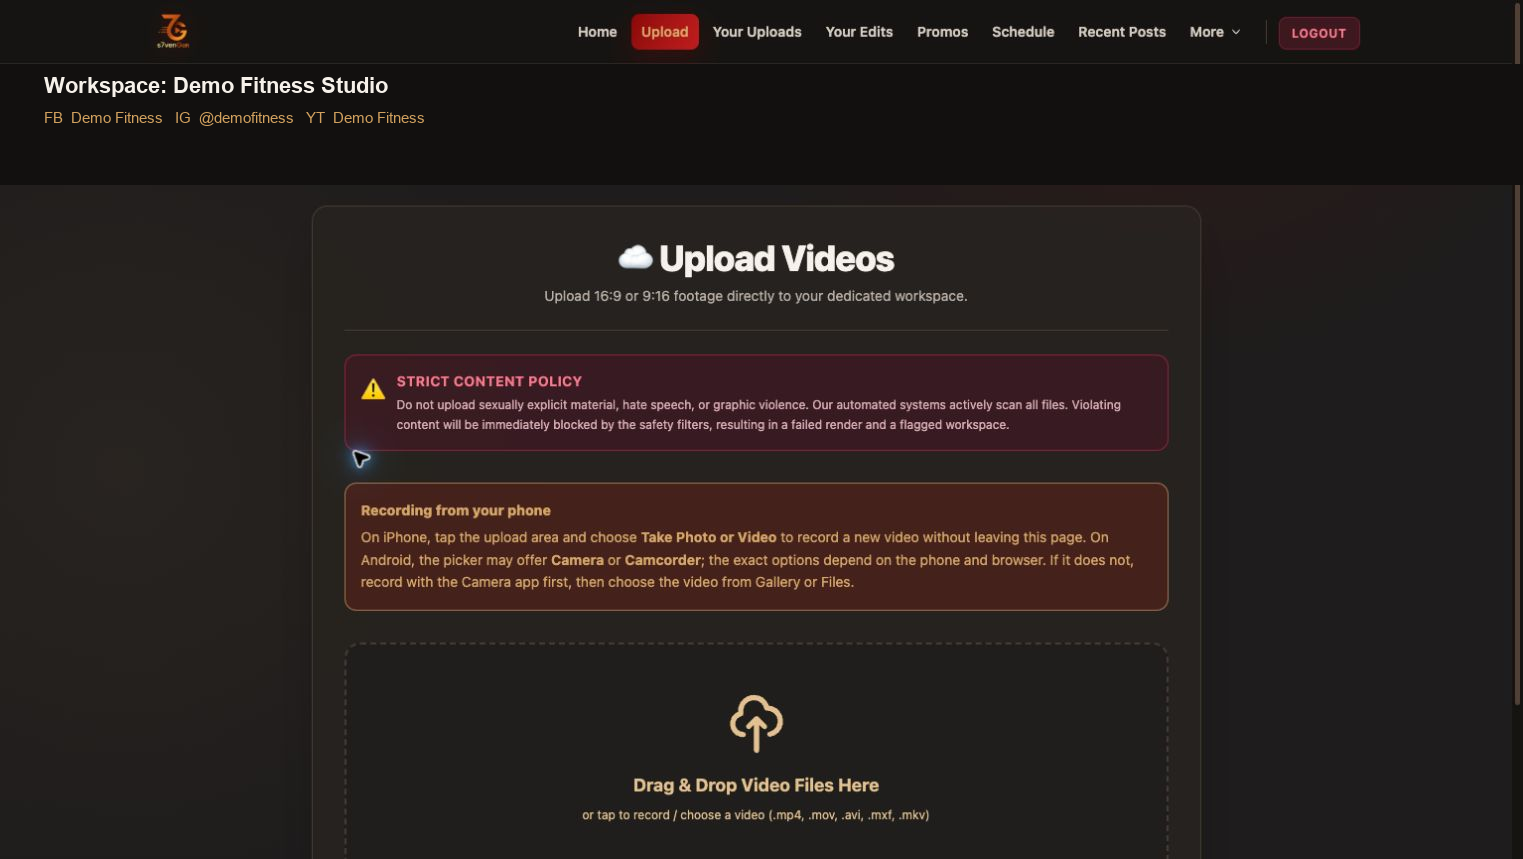
- Choose Main workspace, an existing footage folder, or Create new folder.
- Drag files into the upload area or tap it to choose several files.
- Review the Ready to Upload list and remove anything you selected by mistake.
- Select Upload media and keep the page open until the transfer completes.
- S7venGen opens Edit Uploads. New media can still need a few minutes of server processing.
Cloud files: iCloud, Google Drive, or another provider may have to download the file to your phone before the upload begins. Keep the picker open.
Folders: use one folder per event, client project, or shoot when those files should be selectable as a group later.
Prepare media in Edit Uploads
Edit Uploads contains original source media. Search, filter, preview, trim, reframe, color-correct, and render the useful portions.
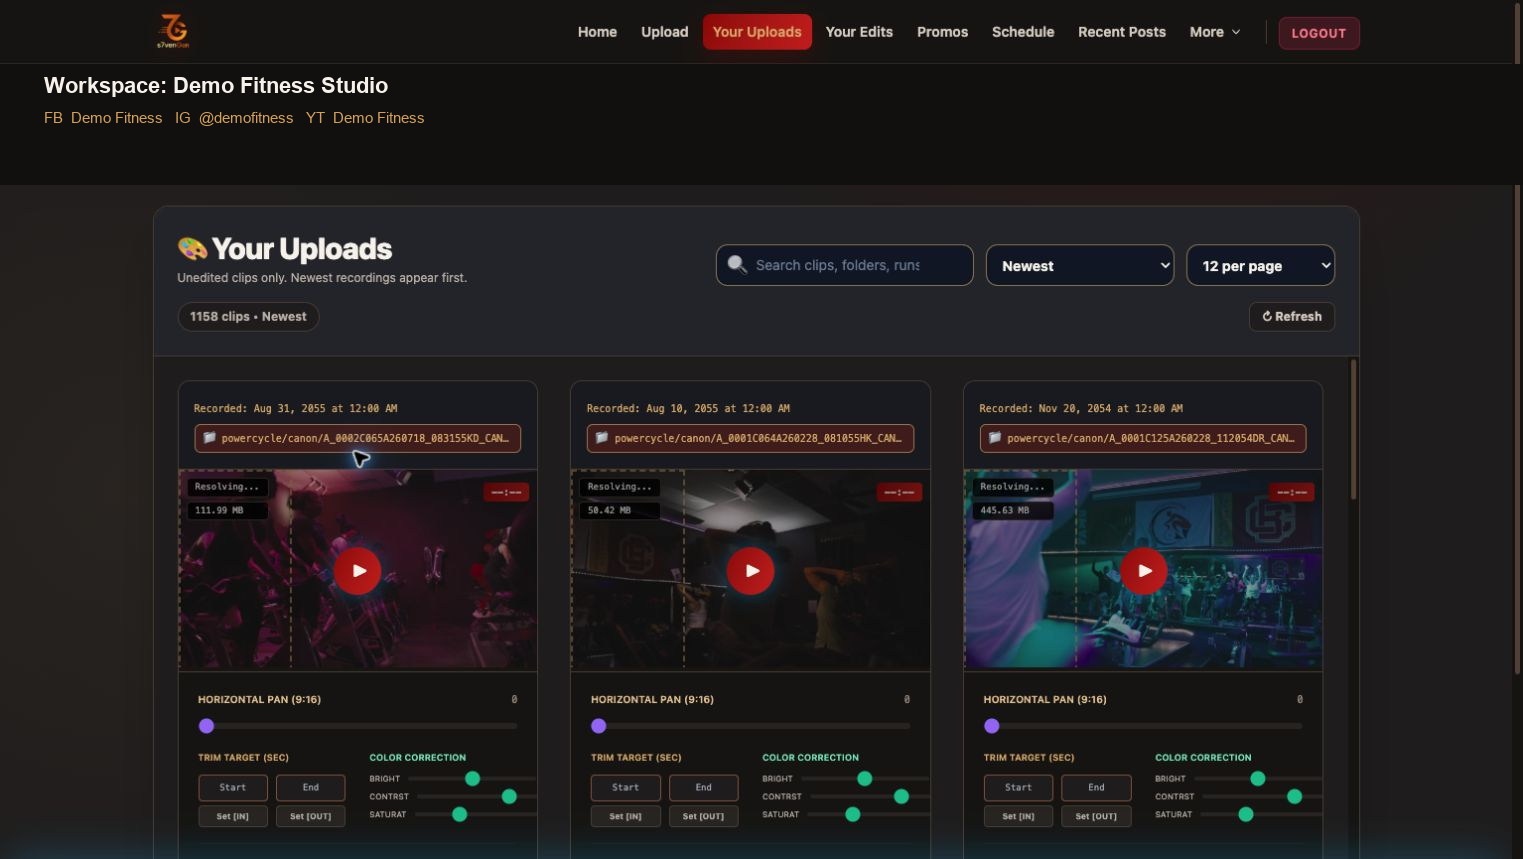
- Find a source with search, sorting, or a footage-folder filter.
- Play the video. Use Set IN and Set OUT to keep the part you want.
- For horizontal video, move the 9:16 frame so the important subject remains visible.
- In Advanced mode, adjust brightness, contrast, saturation, and color temperature only when needed.
- Select Render edit for one file, or Add to batch on several files and then Process batch.
- Use the processing drawer to follow queued and active work. Finished edits appear in Your Edits.
Original source stays intact: when a trim or edit is completed, S7venGen removes the temporary working file and keeps the original uploaded source. Delete is only for intentionally removing the selected master upload.
Review Your Edits
Your Edits shows finished edits created in Edit Uploads.
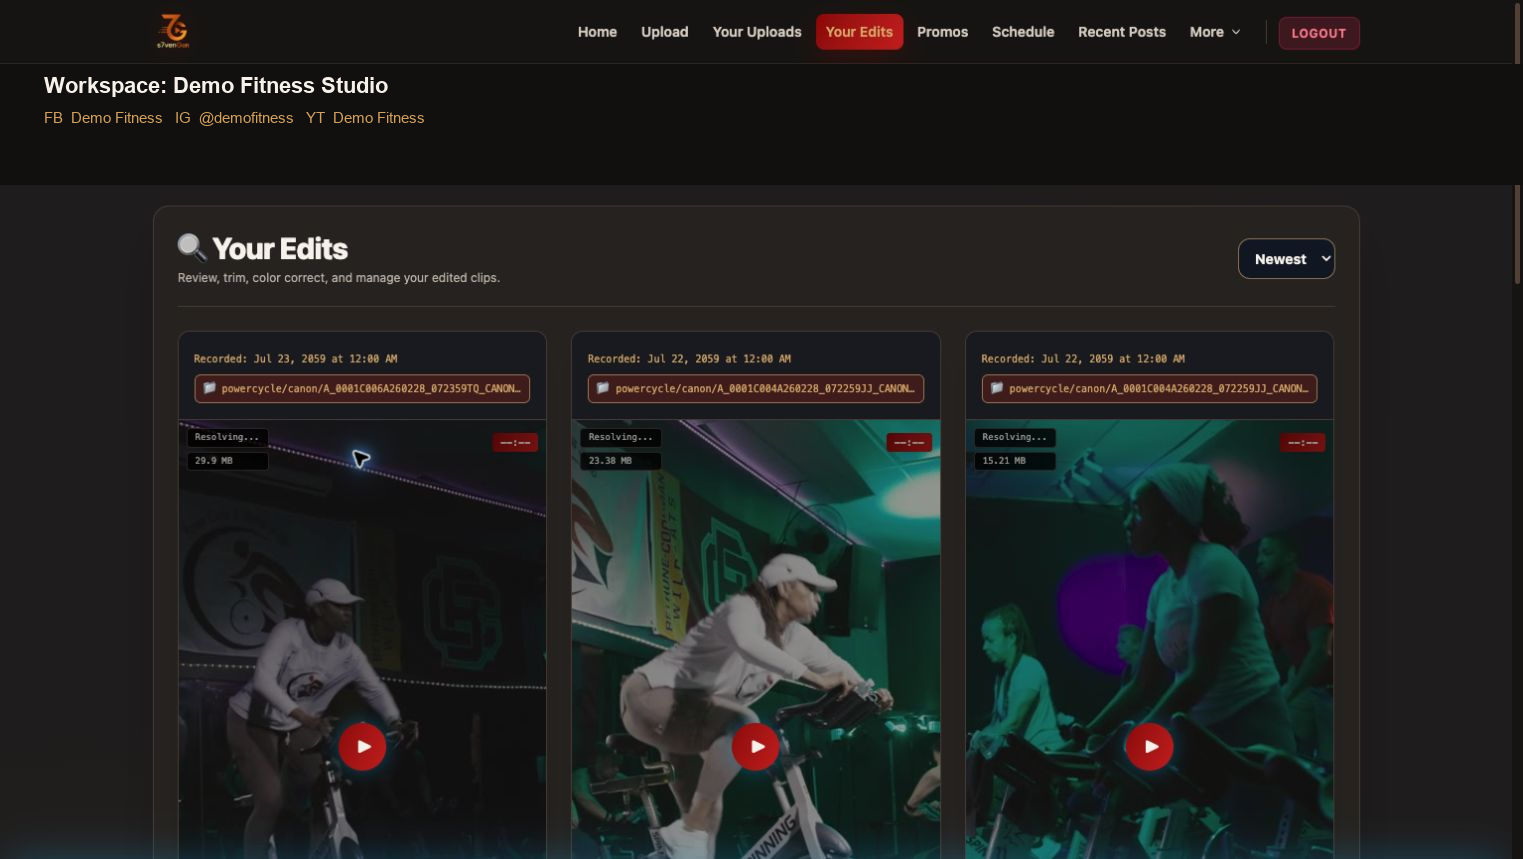
- Play each edit to confirm the selected moment, crop, and color.
- In Advanced workspaces with person tools enabled, a clear paused frame can be saved to a person or added to an existing saved person.
- When the usable edits look right, open Promos.
Create a promo
Choose the footage to use, then let the recommended settings work automatically or open Advanced controls for a specific result.
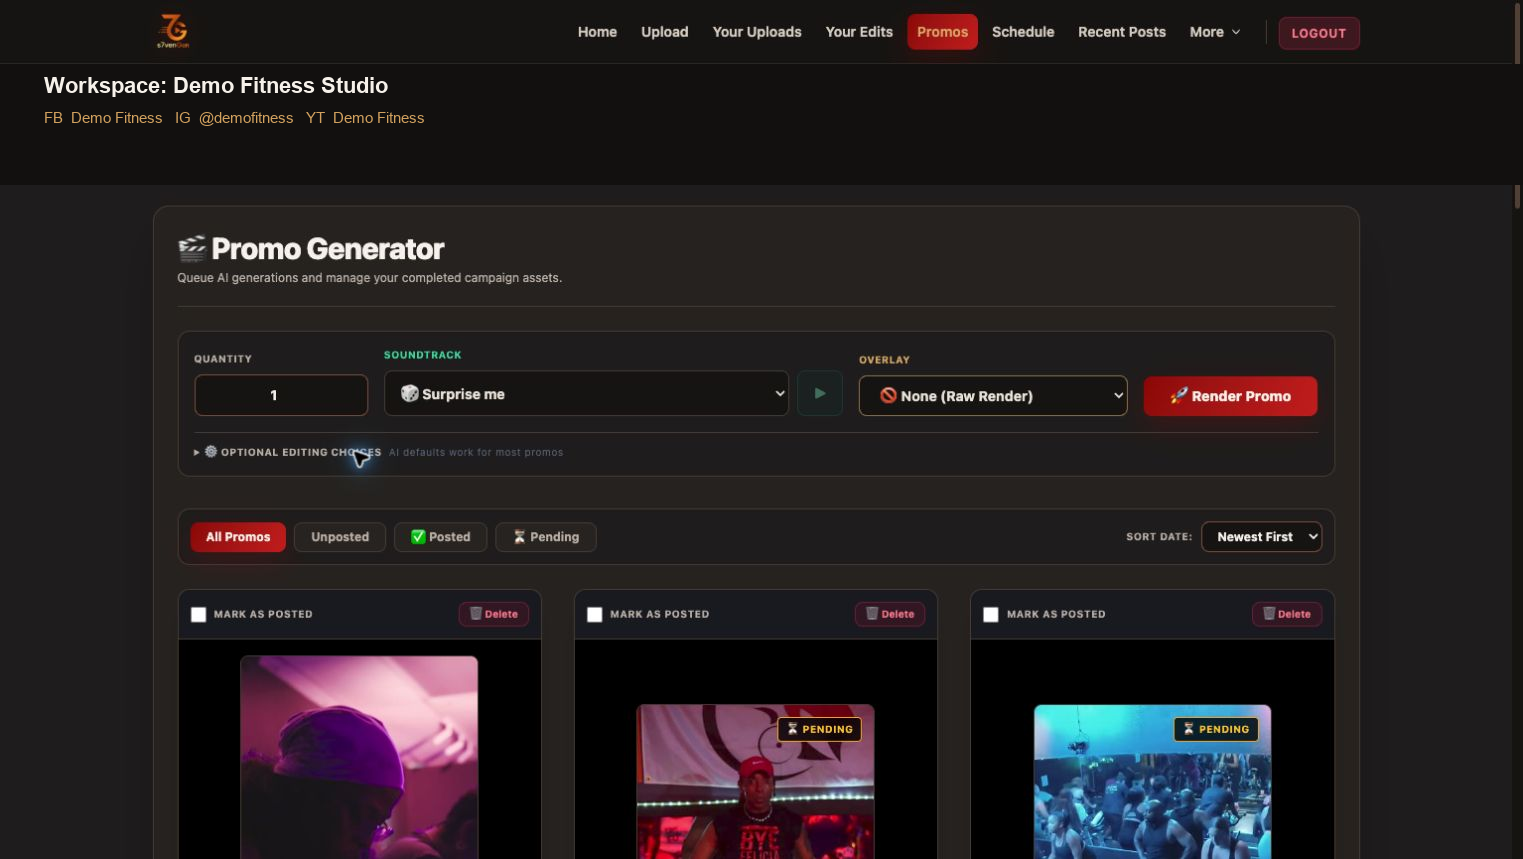
- Under Choose media for this promo, use all photos and videos or select one or more event/project folders.
- In Quick mode, select Create Promo for the recommended automatic edit, music, framing, and social length.
- In Advanced mode, optionally choose quantity, soundtrack, overlay, length, editing style, story focus, framing, audio, and a featured person.
- Check the readiness message. If more eligible media is needed, prepare or upload additional assets.
- Select Create Promo. The processing card stays visible while the render runs.
- Play the complete finished video before downloading or publishing it.
Audio choices
- Music only mutes source-camera audio.
- Featured voice moments uses only brief detected speech moments and temporarily lowers the soundtrack around them.
- Original audio throughout + low music keeps the camera audio across the promo. Use it only when you have reviewed the recording and have rights to everything audible.
Promo readiness
The amount of ready media needed changes with the selected style and length. The readiness message on the Promo page is the current requirement. If it says more media is needed, add ready photos or video, or select additional footage folders.
Edit a completed promo
Open Edit Promo to change the timeline without rebuilding the entire project by hand.
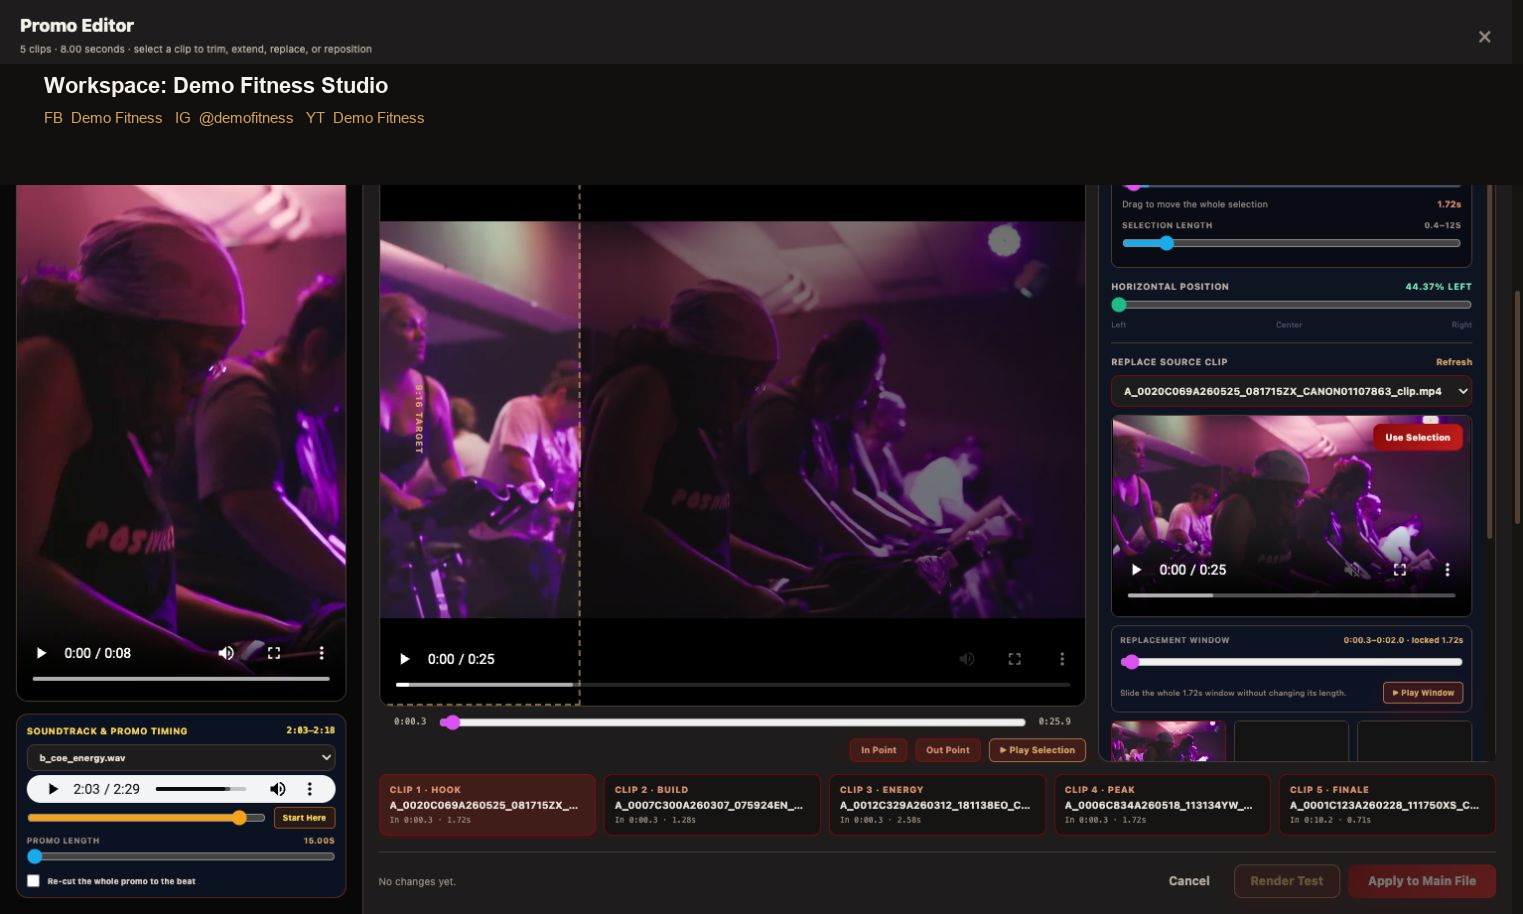
- Select a clip card, then trim, extend, replace, or reposition its source window.
- Reorder clips by dragging them or using the left and right controls.
- For photos, choose slow zoom in, slow zoom out, pan left, or pan right and adjust the photo duration.
- Add up to three short text moments. Choose Animated punch, Clean caption, or Compact label, then place each at the start, middle, or end. Character limits keep text readable and social-safe.
- Replace the soundtrack or choose a different section of the selected track.
- Select Render Test first. Compare the test with the original, then use Apply to Main File only when the revision is correct.
Published posts do not change: replacing a soundtrack or main promo file affects future downloads and posts. Content already published to a social platform remains unchanged.
Publish, schedule, and verify delivery
Choose the exact destinations for each promo, then publish immediately or schedule it for later.
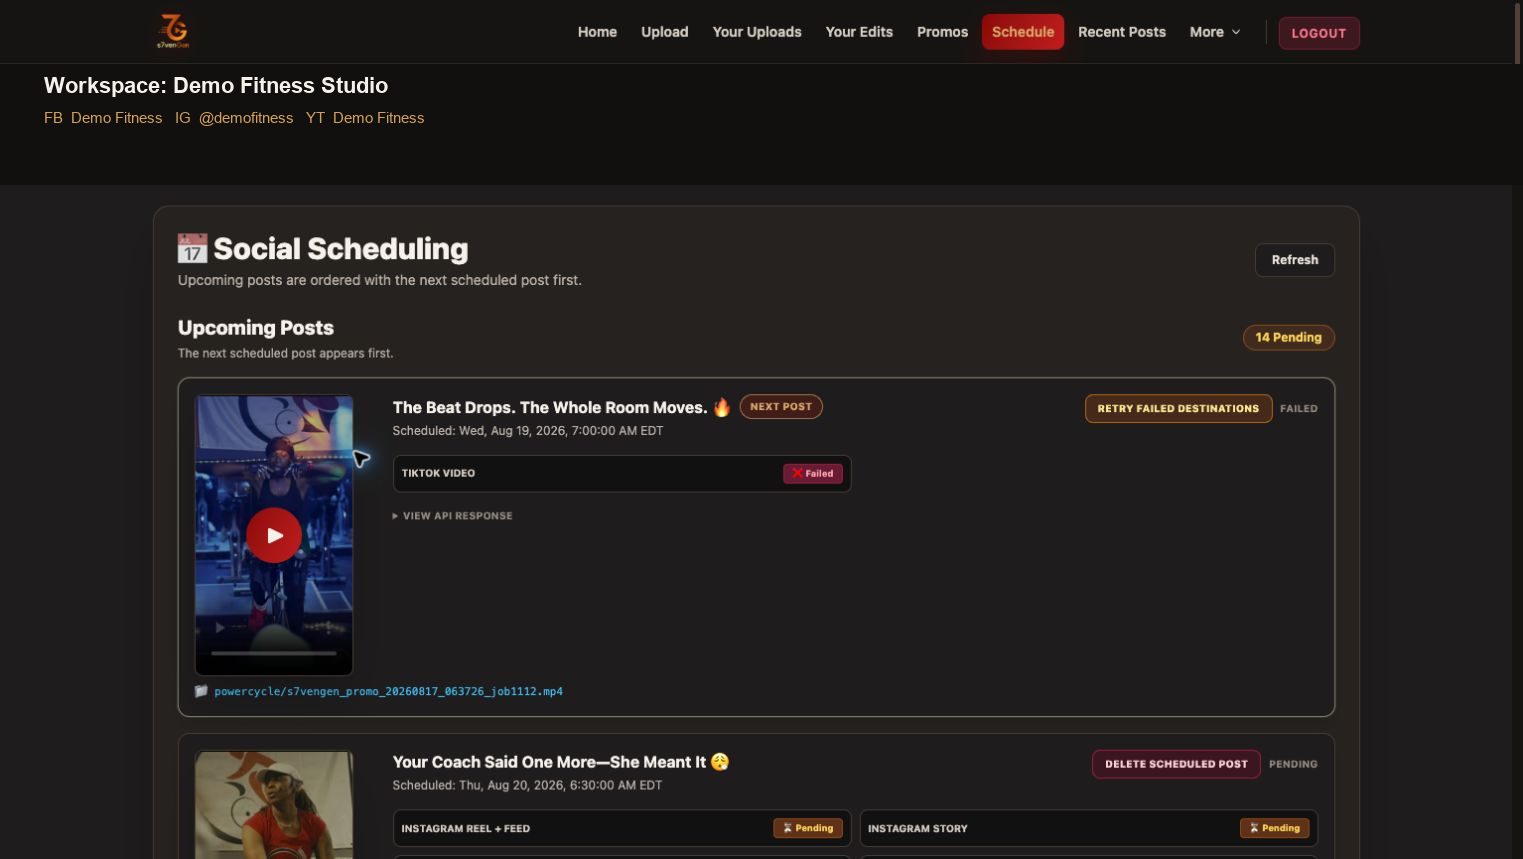
- From Promos, open the publishing controls for the finished promo.
- Review and edit the title, caption, hashtags, and other platform-specific fields.
- Select each destination deliberately: feed, reel, story, short, or video options depend on the connected platform.
- Choose Post now or Schedule, confirm the time, and submit.
- Open Schedule to see each destination's status. Delete a pending scheduled post to cancel it.
- If only some destinations fail, use Retry failed destinations. Successful destinations are not reposted.
- Use Recent Posts to review publishing history and open available platform links.
For TikTok, review privacy, interaction, commercial-disclosure, and AI-generated-content settings before publishing. Platform labels and disclosure rules come from TikTok and must match the content.
Music and soundtracks
Preview shared music, upload music licensed for your use, and queue a track for a future promo.
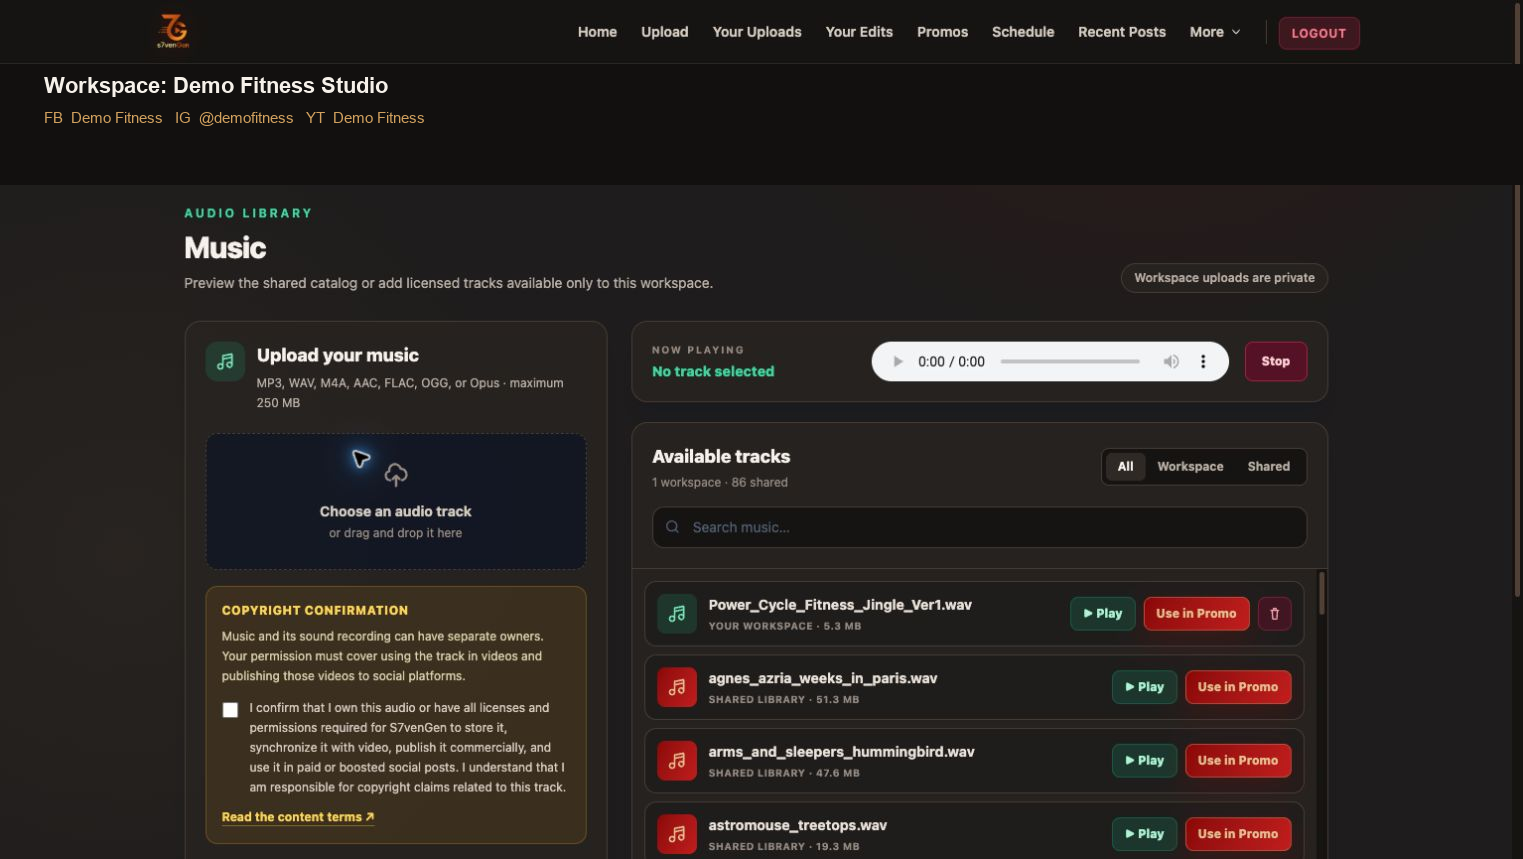
- Use the filters to view all tracks, workspace uploads, or the shared library.
- Preview a track before choosing it.
- Select Use in Promo to carry that choice into the Promo Generator.
- Only upload music you own or are authorized to use. Social platforms may mute, block, or restrict copyrighted audio.
Workspace settings
Control how the Studio looks and behaves, maintain brand guidance, and manage account settings.
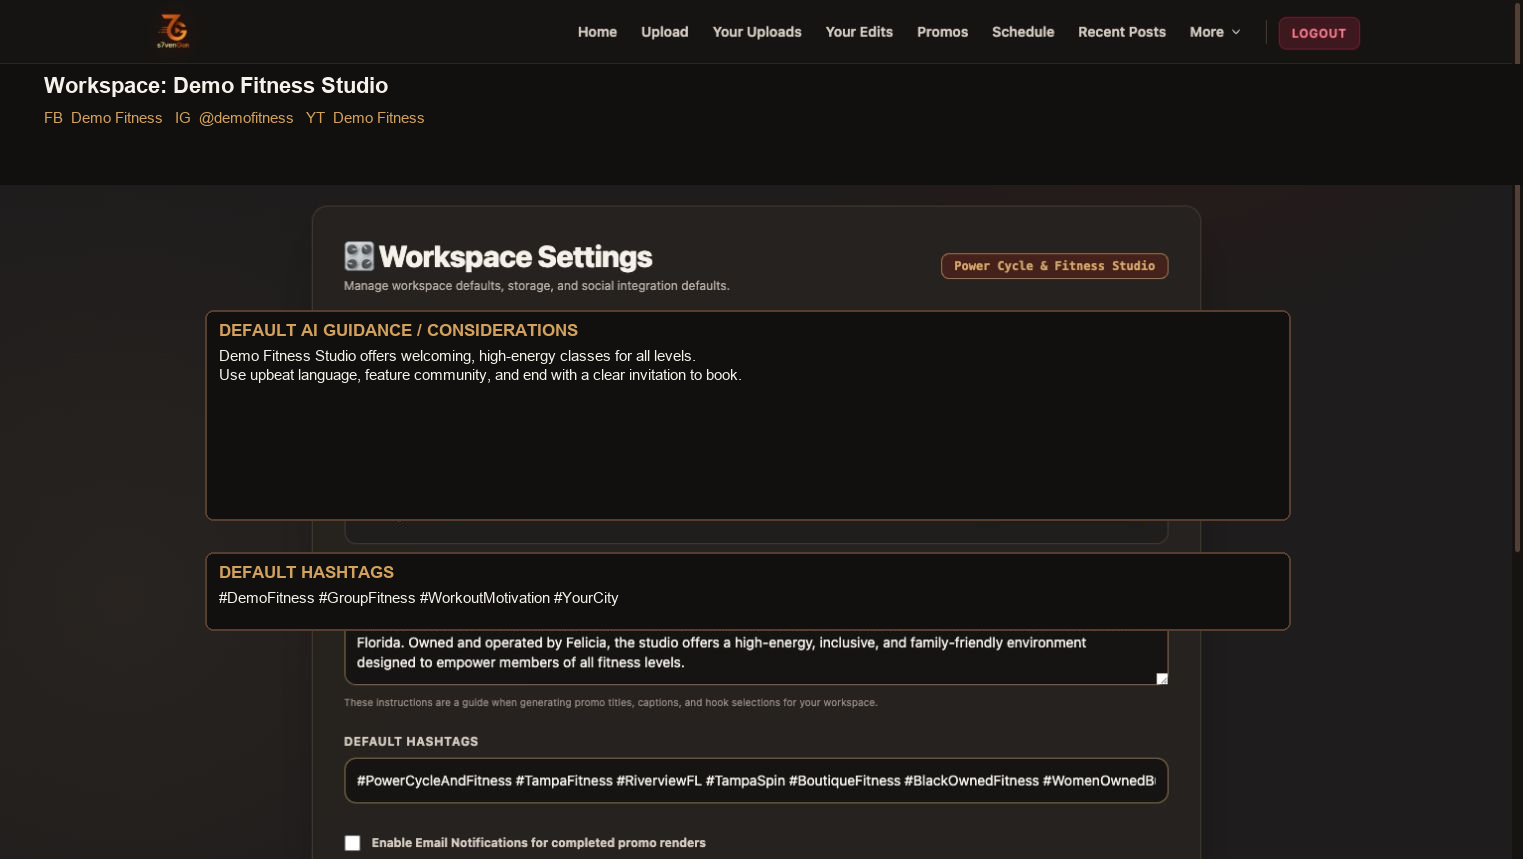
- Choose Automatic, Quick, or Advanced interface mode.
- Choose Dark or Bright theme.
- Keep Default AI Guidance specific: services, location, audience, tone, offers, and preferred calls to action.
- Maintain focused default hashtags and completed-render email notifications.
- Use Scan & Repair only when a completed promo file exists but is missing from Promos.
- Use Login & Security to change the workspace password. New passwords require at least 10 characters.
- Subscription and billing controls are also shown on this page when they apply to the workspace.
Troubleshooting common workflow problems
Check the stage where the item stopped before repeating work or uploading the same file again.
An upload is not visible yet
Open Edit Uploads, refresh the catalog, and check the processing drawer. Large files and cloud-sourced phone files can take longer.
A promo says more media is needed
Confirm the selected footage folders contain enough ready assets for the chosen style and length. Select All footage or prepare additional edits.
A completed promo is missing
Open Profile and run Scan & Repair. This checks the completed promo folder and restores missing library records.
A social destination failed
Check Connect Socials first. Reconnect the affected platform if needed, then open Schedule and retry only the failed destinations.
A promo revision is not what you expected
Keep the main file unchanged, revise the timeline, and make another Render Test. Apply only after reviewing the full test.
Support and custom overlays
Send enough detail to identify the workspace item and reproduce the problem, or request a branded visual overlay.
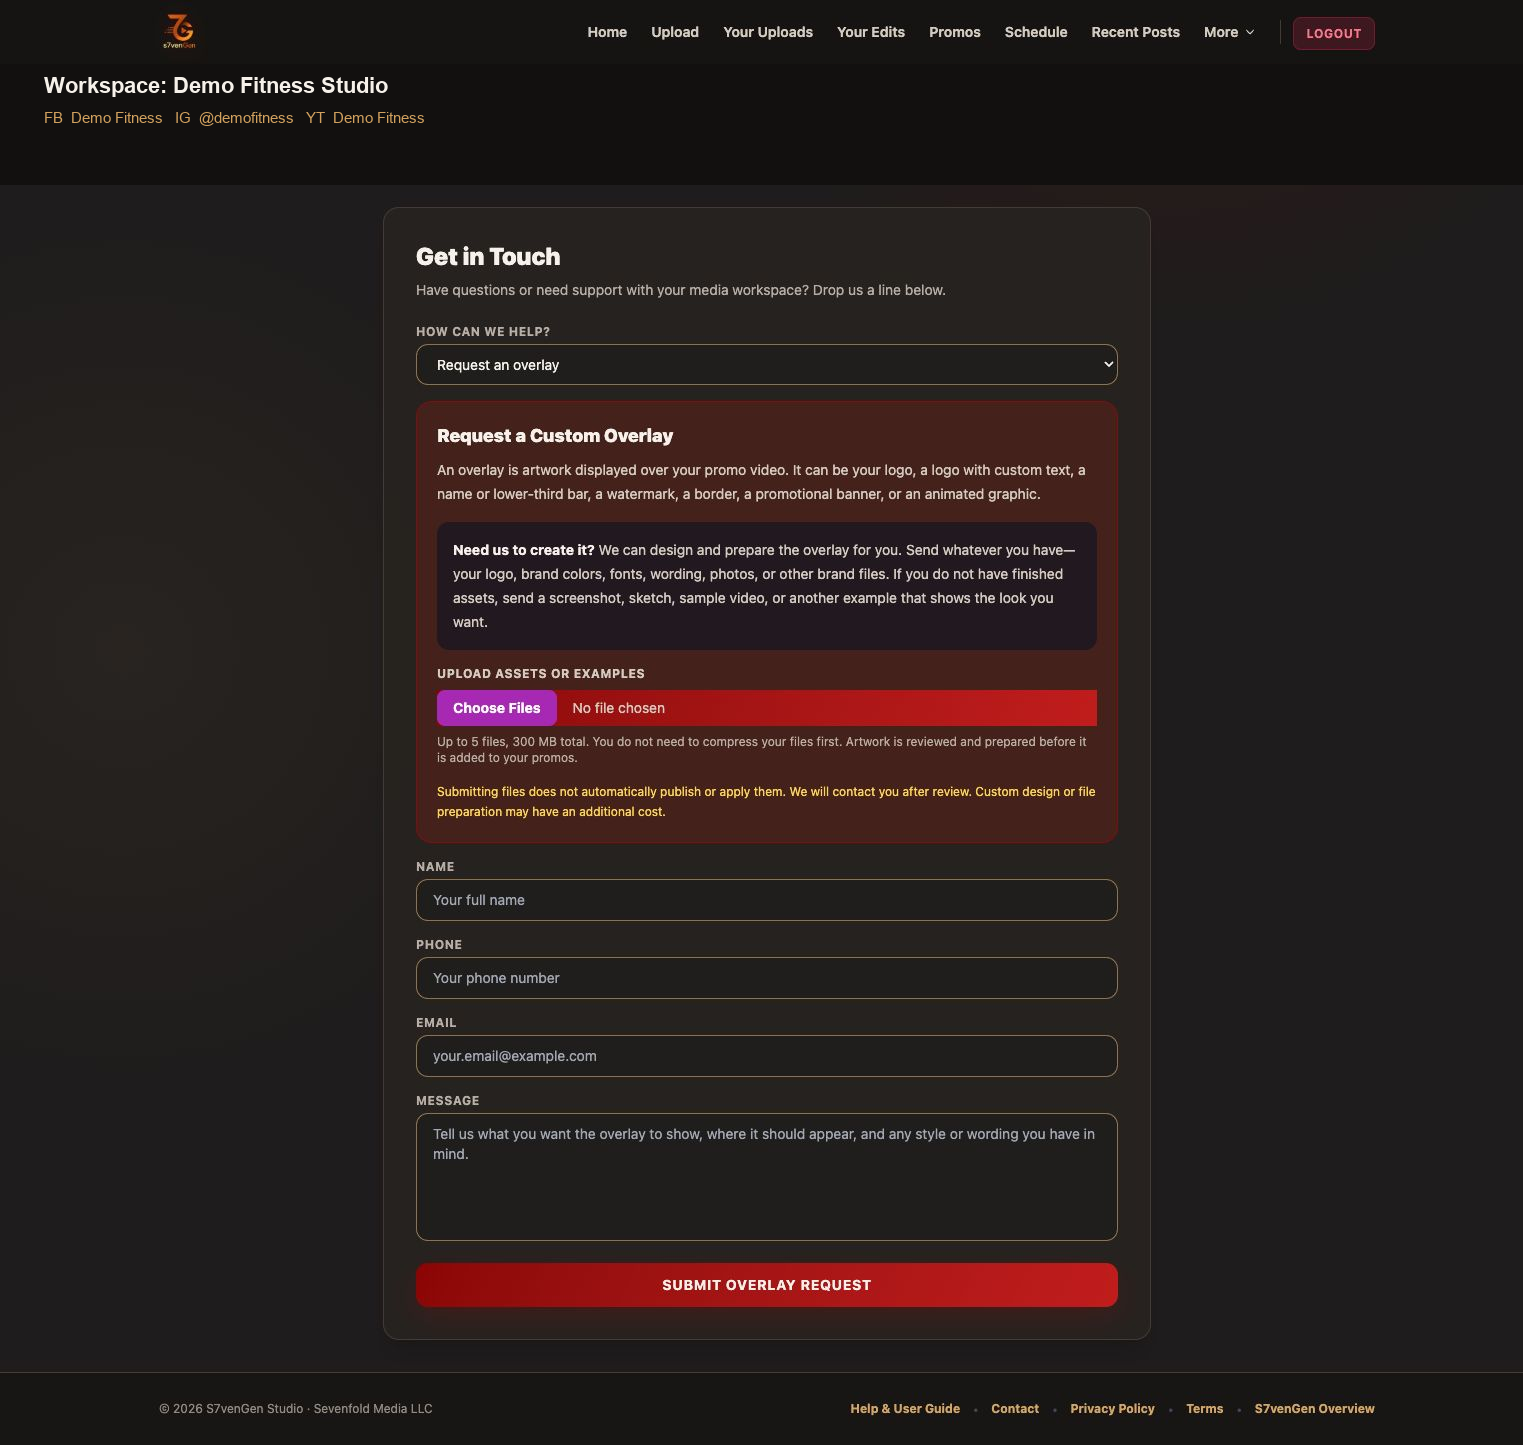
For support
Choose General question or support. Include the page, filename or promo title, what you selected, what you expected, and what happened. Example: “On Promos, I opened Edit Promo for [title]. Render Test finished, but the last transition showed black frames.”
For a custom overlay
- Open Contact & Support and choose Request an overlay.
- Describe the wording, placement, and style.
- Upload up to five files totaling 300 MB: logos, colors, fonts, artwork, screenshots, sketches, or a sample video.
- Submit the request. Files are reviewed before use and are never applied automatically. Design or preparation may have an additional cost.
No guide sections matched that search.
Connect social accounts
Connect supported accounts once, select the correct business destinations, and review connection status before publishing.
You can create, review, and download promos without connecting a social account. A connection is required only for direct publishing and scheduling to that platform.